
You Are Going To Get Insight Of Content
Login through OTP is common these days as we are heading toward a passwordless society. It is easy and convenient for customers who do not want to remember their password. An OTP will come on a registered mobile number and submitting that OTP in the website will let the customer access the website.
OpenCart SMS OTP login module has packed with a lot of features that will make the website manager work easily. It is compatible with the latest version of OpenCart and works perfectly on OpenCart themes present in the market.
Here is a setup-by-setup guide that let you configure the module with ease.
1. Install The OpenCart SMS OTP Login Extension
You can download the extension from the opencart official site or our website. The downloaded file will be a zip file.
There are two ways to install the extension on the OpencCart website.
- Use the admin In-built extension installer
- Upload the files of the extension to the website using FTP/Cpanel.
I recommend you use the 1st method, It is simple and easy and takes only a few minutes to install the extension on the site.
Use The Admin In-built Extension Installer
Step 1

- Login in to the admin panel
- Go to Extension → Installer
- Select the zip file of the extension
- wait for installation complete,
- You will get the message “You have successfully modified the extension”.
Step 2

Now it’s time to refresh the modification to make the extension work throughout the website. After every installation and uninstallation or enable and disable the module, the admin must refresh the modification.
The next step is to install the OpenCart SMS OTP login module from the module list page
Step 3
Go to Extension → Extensions

Here you must select the module from the drop down. Our extension falls into the module list of OpenCart. Look for our TMD OpenCart SMS OTP login module and click on the install button.
Now our extension is ready to configure to use for customer login and send messages on various events.
Install The Extension Using FTP/Cpanel
It is quite difficult and requires technical knowledge of website management.
The downloaded extension file is a zip file. You need to extract it using software like 7zip, zip extractor, windows inbuilt extractor, WinRAR, etc. You will find the sub folders named catalog, system, and admin.
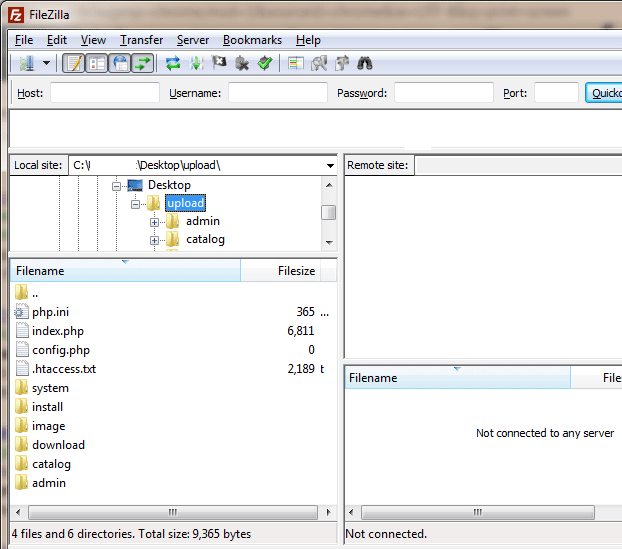
Either use the FileZilla Software or CuteFTP software to login into your website hosting section where we can access the files of a website hosted on the server.
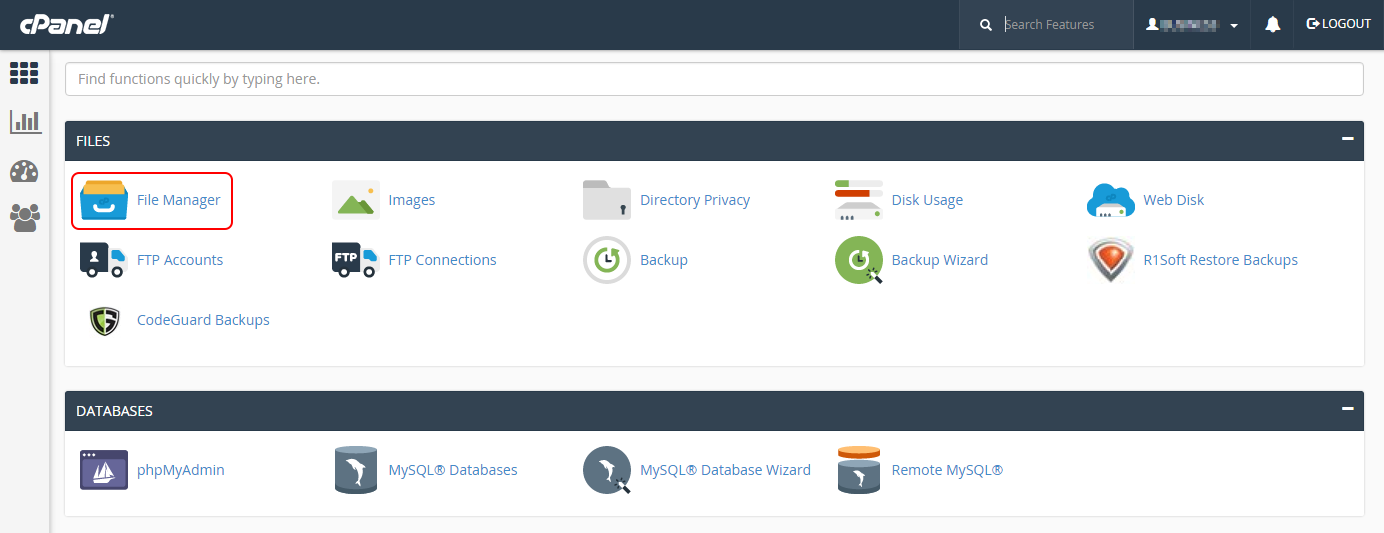
You can log in to the Cpanel of the website. If you are good with technical knowledge and are comfortable.
Select the File Manager. Select the public_html or www folder.
If your website is hosted directly on the website then you are at the right place.
All you need to follow the same path structure of folders present in the module. Just copy the file and upload it to the exact file structure of the website.
To make sure, double-check the file location structure. The extension won’t work if there is a mistake while file uploading.
After all, the files are uploaded, we need to login into the admin panel and follow the instructions of step 2 written in “Use the admin In-built extension installer”
2. SMS Provider API Setting
You can watch our module setting video which will help you to do the SMS API setting correctly.
If you prefer to go through each setting and option in detail. Please continue the below. We have written the complete documentation of the SMS module.

SMS will be sent by API request from the website to the SMS service provider. For this, We need to follow the setting in the module.
API Method
There are two kinds of API that can be requested either with the GET | POST method.
First, you should know which API method is supported by your SMS provider. Then select the right API method type.
URL Format
We need to write the correct API URL with all the required values. So that API will deliver the message and OTP to the customer. You will get the API example from the SMS provider. Please copy the API URL according to the selected method(GET or POST).
Here is a dummy example of an API URL for you.
http://international.viralsms2u.com/websmsapi/ISendSMS.aspx?username=xxxx&password=xxxxx&message=xxxxxx&mobile=9999999999&sender=xxxxxxx&type=1
In this example, username and password are your account access on an SMS service provider, the mobile number will be a receiver, and the sender is the number that will use to appear on the receiver device. And the message will contain the information that is sent in SMS to the customer’s device.
TIP:
Every SMS provider has its own api format to send the api. Please double-check the api URL. There are higher chances that SMS not delivering due to misconfiguration of api URL
Resend Time
The time interval between the two SMS sends to the customer. Enter the time in second. Also, according to the recommendation of the SMS provider company, set the minimum time.
Mobile Number
This should be the website number. It will use to send the SMS and customer will be able to see this number on their mobile.
Please use the same registered number that is approved by Government authorized body.
Debug
It uses by developers to check the log of api calls, Either api call is successfully completed or not. If Debug is enabled, then all the API responses and errors are saved in the website error log.
Developers and website owners can check it and do the rectification of api to make it a successful call.
SSL
Secure Sockets Layer(SSL) is an extra layer of security on a website to prevent hacking and unwanted user to steal the data. If your SMS provider asks you to send the api request should have SSL enabled then, Select the YES
Status
Admin can make the module work stop by changing the status to disable.
3. Write SMS And Select The Approved SMS Template From SMS Provider
In this section, we will do the SMS template writing and select the right “
Sms Template For Registration Events
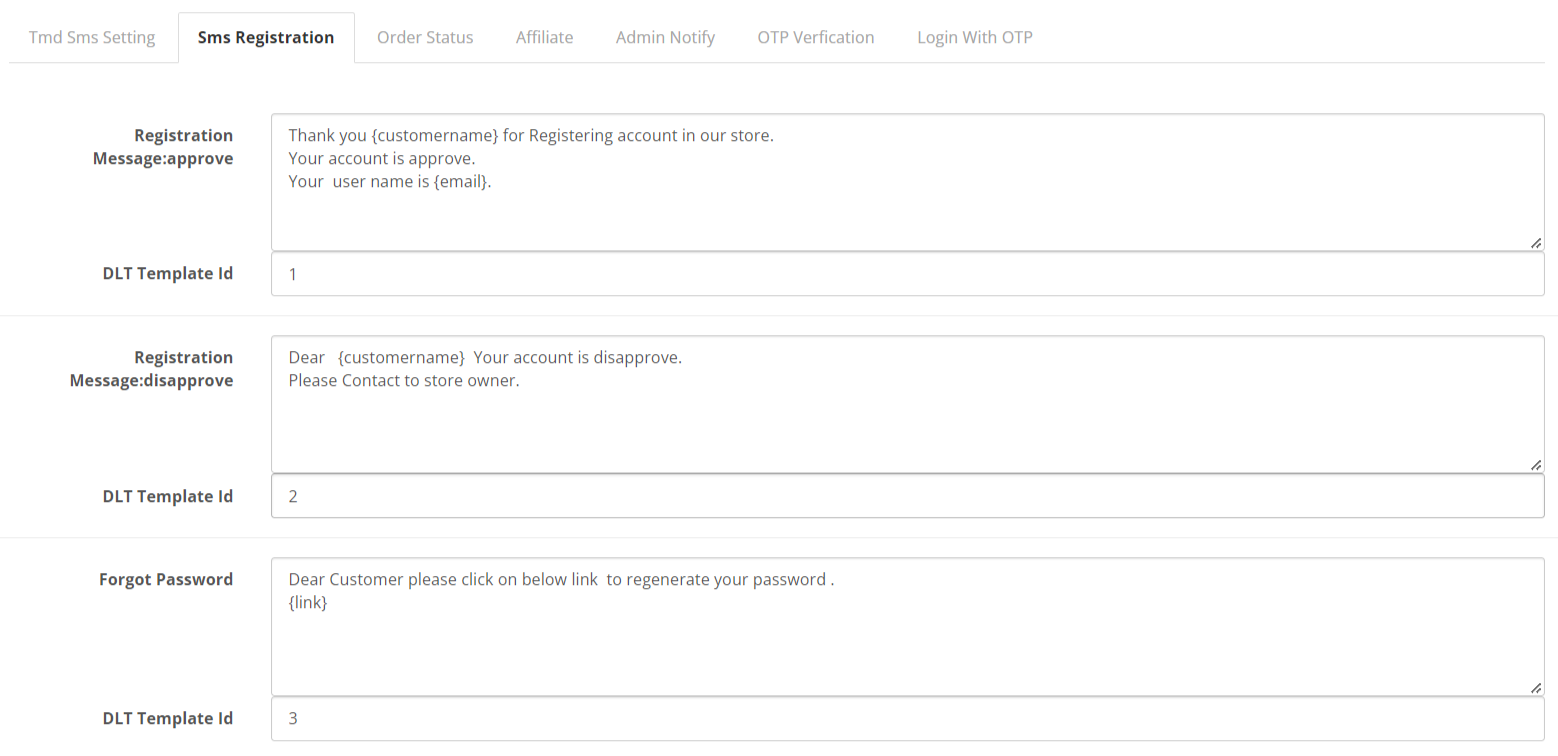
Registration Message: approve
OpenCart sms OTP login module will use to send the SMS to that new customer whose account is approved by the admin or auto-approved by the website.
Registration Message: disapproved
That customer whose account is disapproved by the website will get this SMS.
Forgot Password
Admin should write the SMS carefully. and include the link to forgot password page. Where customer can update their account password.
SMS Templates For Order Status Update Events
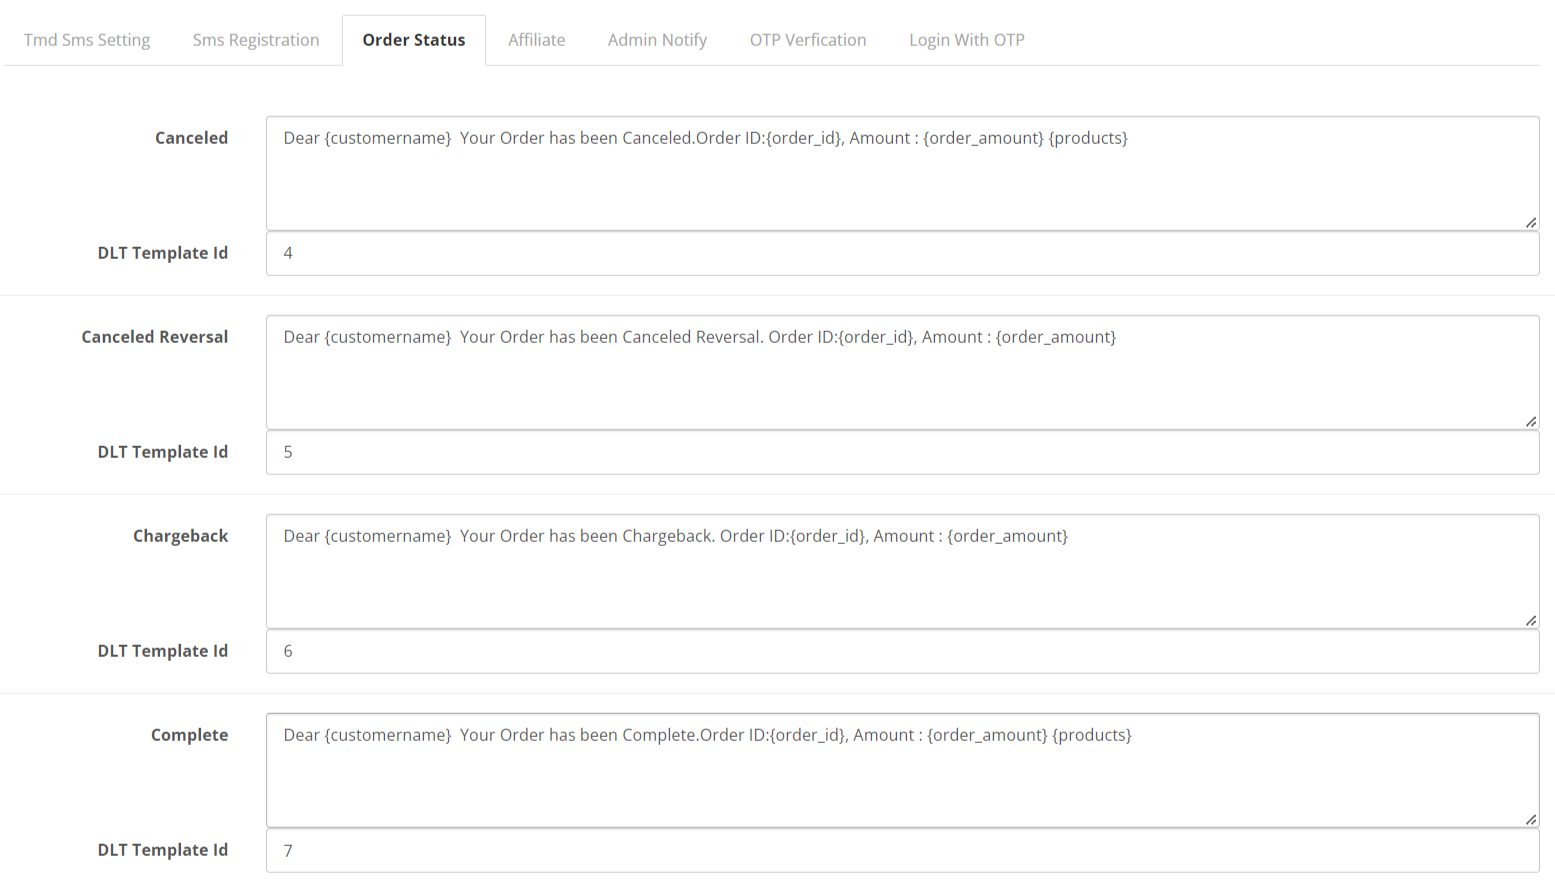
It has an SMS template for all the order statuses enabled on the website. All the order statuses will list here. Admin can write the SMS template each order status separately.
Whenever there is new order status added by the admin, This page will display the newly added order status.
SMS To Send On Affiliate Events

If the website has enabled the affiliate registration then this setting is useful. In this tab, the admin can write the SMS for
- New customer account approved
- Customer account disapproved
- Forgot password
Admin Will Get SMS On These Events

This SMS template setting is only for website admin. OpenCart SMS OTP login module will use to send the SMS alert to the admin on these events.
- New Order
- New Customer
- New affiliate Signup
Tip:
There is DLT Template Id with every SMS, It is gov. or the authorized company that approved the SMS template and gives the template number. Enter the template number in DLT Template Id. Every time we send the SMS, the authorized company or gov. will verify whether the template number is related to the SMS or not.
Sending the wrong template number will delay the SMS and ultimately account will have the banned or disabled.
4. OTP Verification And Content Display On OTP Successfully Verified Page
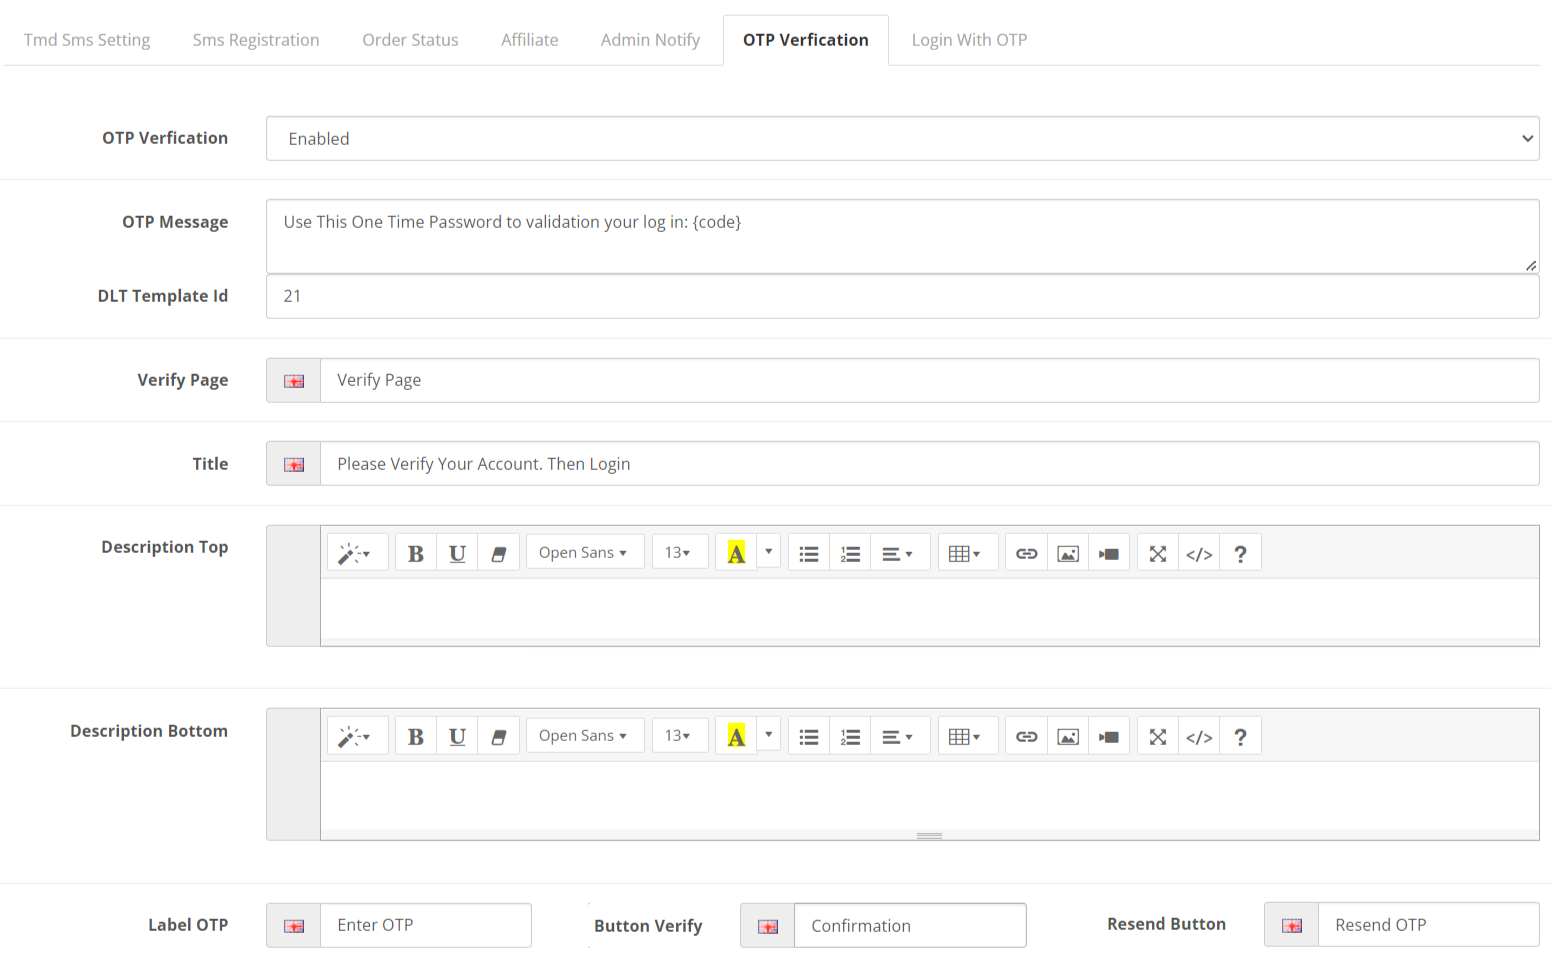
The OTP verification can be enabled and disabled by changing the status to disabled. It will hide the OTP verification from the login and checkout page.
It can be shown again on the website again by changing the status to enabled. Moreover, when customers verified the OTP successfully and land on the success page. The admin can also write their own message that will display on this page.
1. OTP verifies page title.
2. Description top and bottom.
3. Label OTP button verifies and resends button
Login With OTP In OpenCart
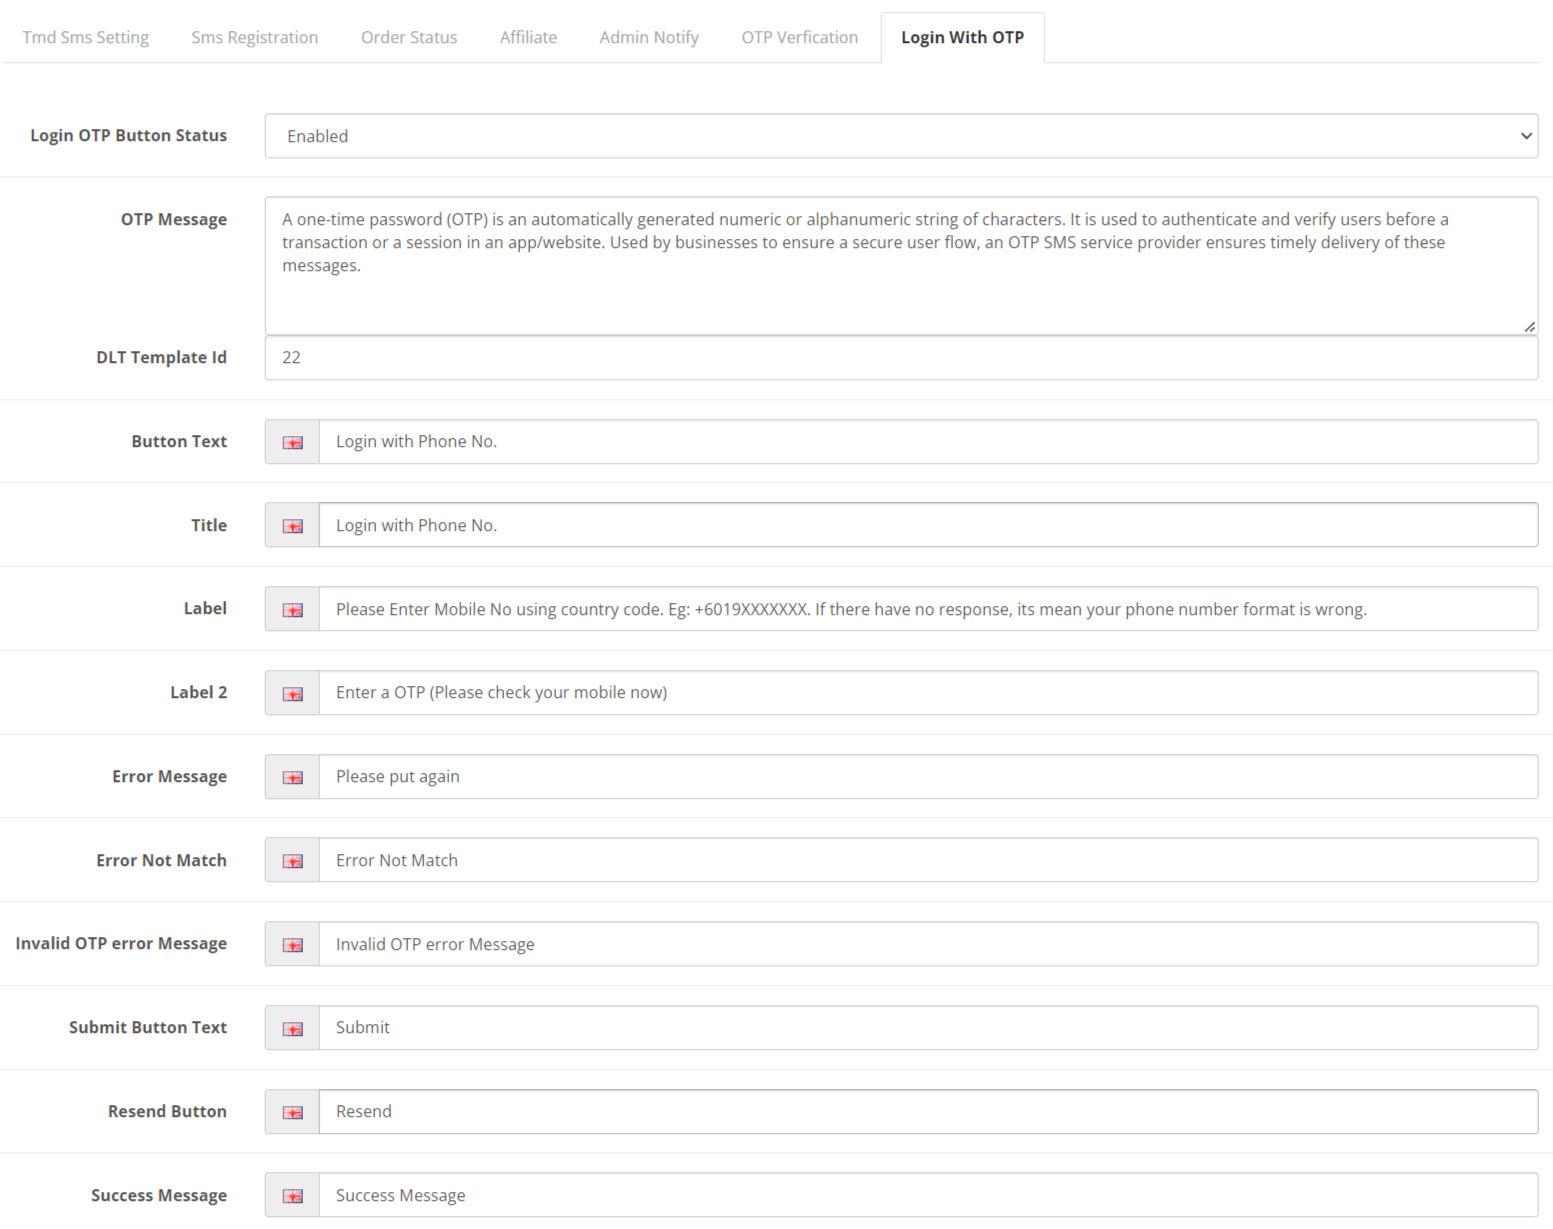
It will bring the option of login with a mobile number on the login page and checkout page login section. A button called Login with OTP will automatically be added. OpenCart SMS OTP login module manages everything on its end and the admin does not worry about the SMS customer mobile numbers.
Admin can write the text in multi-language.
1. Success Message
2. Resend Button
3. Submit Button Text
4. Invalid OTP error Message
5. Error Not Match
6. Error Message
7. Title
8. Button Text
9. OTP Message
10. Login OTP Button Status