
You Are Going To Get Insight Of Content
OpenCart is just not an ecommerce platform that lets you create a product-selling website. But It comes a long way. Now it has the option to convert your website into a multi-seller platform for others to sell their product on your website.
OpenCart multivendor module is use to facilate the multi-seller plateform in the OpenCart website. Website admin can manage everything from seller account to commission payout. Payment methods to shipping rates. It has the complete features that make the multivendor website successful.
In this documentation, you will learn how to use the multivendor extension effectively.
Installation:
The installation OpenCart multivendor module is the same as another extension of OpenCart. You can follow this Process Of Module installation of OpenCart It has all the steps written to get the module installed on your website.
Vendor Setting
This setting will take admin to the vendor store and their profile. There are more than 4 tabs present. These settings are explained below.
1.1 Setting
This section tells the admin what information should be visible to whom. On the vendor list section what information should display or hide.
1.1.1. General
Admin can do the setting for vendor store. There are 6 options available for show and hide at any time.
1.1.1.1. Customer can view Vendor info YES/NO
1.1.1.2. Vendor can view customer info YES/NO
1.1.1.3. Vendor Auto Approved YES/NO
1.1.1.4. Vendor Products Auto Approved YES/NO
1.1.1.5. Hide Vendor Contacts YES/NO
1.1.1.6. Vendor Account Terms: Condition page to agree with the vendor account
Vendors List Setting
It is important to show information about the vendor for transparency and win the trust of customers. OpenCart multi vendor module lets you decide what information will show on the vendor list page? Selecting the NO will hide the information of all the vendors.
1.1.2.1. Vendor Name: Yes/NO
1.1.2.2. Vendor Email: Yes/NO
1.1.2.3. Vendor Phone Number: Yes/NO
1.1.2.4. Vendor Social Icon: Yes/NO
1.2. Vendor Restriction
This setting will let the admin decide what kind of order will display to vendors. It means every order placed by the customer has an order status assigned. From what order status, the vendor will get or not receive the payment.
Show Order
Select the order status for a seller. When an order has admin-selected order status then, the order will start displaying to the vendor. Else order won’t show in the vendor dashboard and order list page. Vendor order status is the same as admin order status
NOTE: All the orders of vendors will always display in the OpenCart admin panel.
Earn Payment
The vendor will only earn when an order gets a complete status. Admin should select the complete order status from the list.
1.3. Language
Write the text in all active languages on the website. For example, if you have two languages i.e. English and Arabic then the admin must write the representative text in English and Arabic.
OpenCart multivendor module comes with text written in Engish language by default. If you do not enter the text in the English language tab and just write the text in Arabic and Hindi. The extension will take the default English text, for other languages in that you did not enter text.
NOTE: If you intended to leave the text blank in other languages then English language text will show.
1.4. MultiVendor Profile Tabs Setting

On the vendor store, there are tabs displaying its information. These tabs will show the data of vendors in the tabs. Admin can set the position of the tab using drag and drop. Tabs will show in the same position as the admin set it. Here is the tab’s setting present in the OpenCart muti vendor module
1.4.1. Profile Tab: Show the vendor profile information such as vendor detail
1.4.2. About Store Tab: It will show store detail like tax information
1.4.3. Product Tab: All the products of the vendor will be listed in this section
1.4.4. Show Review Tab: Customer-written reviews about the vendor store will be listed here.
1.4.5. Product Review Tab: All the product review will be left by customers will appear.
1.5. Manage Seller Signup Fields From Setting
It is important to take only the necessary information on the signup form, the rest information can edit on the profile page. That is why this setting in the OpenCart multivendor extension lets the admin manage the vendor signup form fields. The signup is made of 4 sections where we collect various information. By default, all the fields are enabled. Admin can disable the fields that are not required anymore. Disabling the fields will hide them.
Personal Details
It has the personal information of the seller such as display name, address, about the vendor, etc. Admin can show and hide the personal information fields which are not required to make the signup process easier for vendors.
General Store
Here admin can collect information for vendor store, description, shipping, and return policy. Every store has its own policy of return and shipping. It is really important to write how the vendor store will process the order.
Admin can enable the SEO meta description and meta keyword fields vendor’s website for Search engine optimization.
Data Store
It is an important part of the vendor signup form. it consists of fields like store logo, big banner, tax number, shipping charges, address google map url, information, bank information for payment, vendor profile image, etc.
Admin must carefully check each field and decide which one must be filed by the vendor and which one to hide. As it might cause the missing vendor information problem.
Payment Details
There are two payment methods present for now. Papal and Bank transfer, According to the payment accepted by the website, the admin can enable the payment method. The seller can select one payment method to process the payment.
2. Manage Vendor
The admin can see all the vendors list who created their stores. The vendor list will display in a tabular form. It contains the store vendor image, vendor name, store name, number of products, email, date added, status, approve, and action.
Date added: Vendor account created date.
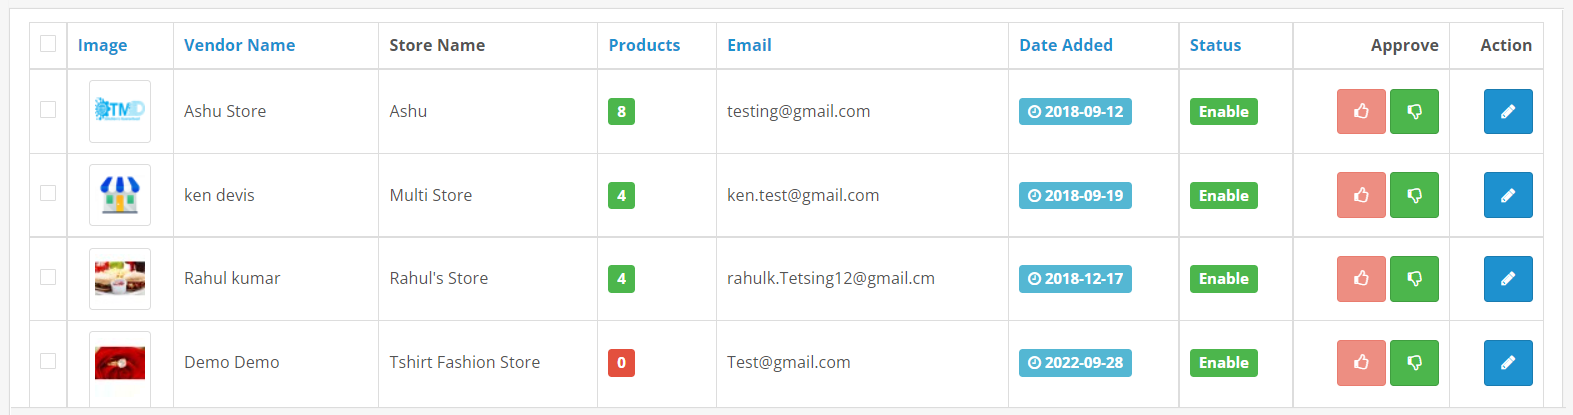
Status: Vendor account status. It has two results, enable or disable. Enable means the Vendor account is working fine. Disable means, there is something wrong happened with the vendor account and hence account is inaccessible.
Approve: It shows vendor account is approved by the admin or not. Admin can approve or un-approve the account by pressing up thumb and don thumb icons respectively. If the admin unapproved any vendor account then they can not login into the account. It needs to approve the account again to make the vendor account accessible.
Action: It lets the admin edit the vendor account.
Filter:

There are 4 fields present in the filter. These are vendor name, date added, approve, and status. Admin can any one of all the fields to get the required vendor list.
NOTE: There is a link present on the top that will redirect the admin to create a vendor account. The signup form fields will be the same as it displays for vendors on the front end.
3. Set The Commission For Sellers
OpenCart multi vendor extension lets the admin give the commission on every sale. To make the work easier for admin, the commission can be assigned per category. There are two options for commission.
1. Fixed amount
2. Percentage.
Admin can enter the amount that the module will automatically assign to the vendor on the product sale of that category.
For example:
If admin entered fixed $5 and 2 percent then Both will be summed up and the commission will be calculated as product price 2% + fixed $5.
Either use both options fixed amount and percentage to give commission. Or the admin can enter the fixed or percentage, and select the one.
As soon as the product is sold, the vendor will assign the commission to their account according to the product category commission.
Vendor’s Commission Report
It has a list of all vendors who earn the commission. This report has detailed information that clears the commission report. The commission is calculated as per the commission set by the admin in the previous step.
Please keep in mind this report tracks every single commission earned by the vendor. If vendor A has three orders, vendor B has two orders, and vendor C has one order, Then this report will show you vendor A three records, vendor B two records, and one record for vendor C.
- Vendor name
- Product name
- Model
- Quantity
- Product price
- Commission value
- Commission fixed
- Commission total → earned commission on the order
- Date – order date
Filter
There is a filter present that lets the admin filter by date and vendor. This will help the admin to see the records per vendor. Also selecting the date will only get the commission records of that date. It is helpful to generate the MIS report.
Typing the vendor name will show the vendor name list, the admin has to select one vendor name.
Vendor Product
A vendor product report is really necessary to run the multivendor website smoothly. This report has vendor image, vendor name, store name, product name, model, price, quantity, status, and action.
1. Status will be enabled or disabled. Enabled means the product is ready to sell in the vendor store. If the product has disabled status then the product is either disabled by the admin or the vendor itself.
2. Action: Edit the product.
This extension lets the admin edit vendor product information such as product name, category, price, SEO information, attributes, images, discount, etc.
Also, the admin can re-assign the vendor, and re-assign the store(if there is more than one store present) disable the product, or delete the inappropriate product that does not suit your multi seller website.
Filter:
This filter contains vendor name, product name, model, price, quantity, and status fields. Using this filter, the admin can track down the products easily and generate MIS-vendor product stock, disabled products, store products, and other reports.
MultiVendor Order Report
When a customer makes an order on the vendor store, then the vendor order is saved on the website. Using this report admin can know which seller is performing better than others.
Admin can view the report of vendor orders and generate the invoice for each order. Reports have these fields for better understanding.
Order id
Customer name
About vendor
Total → payable total amount
Admin Status → order status
Date Added → date of order
Action → view
The about vendor column has information about the vendor and its ordered product information. Fields are product name, store name, vendor name, STATUS —
Clicking on the action icon will generate the invoice for the order. Admin and vendor both can print the invoice. Order shipment can also be printed from the print shipment icon present at the top of the page.
Filter
Like other report filters, this report also came with a filter. The fields are order id, vendor name, vendor order status, customer, and date. This filter is very useful for the admin to make the report of vendor orders.
Vendor Review
Customers can write feedback for vendor stores. It is also called vendor review. All the vendor reviews will see in this report. The columns are vendor, review text, date, and status.
Additional information such as customer name and quality rating can be seen in editing the individual review. Quality has a 1-5 rating, where 1 stands for worst and 5 means awesome. Quality indicates the overall service given by the vendor.
Create New Review Fields
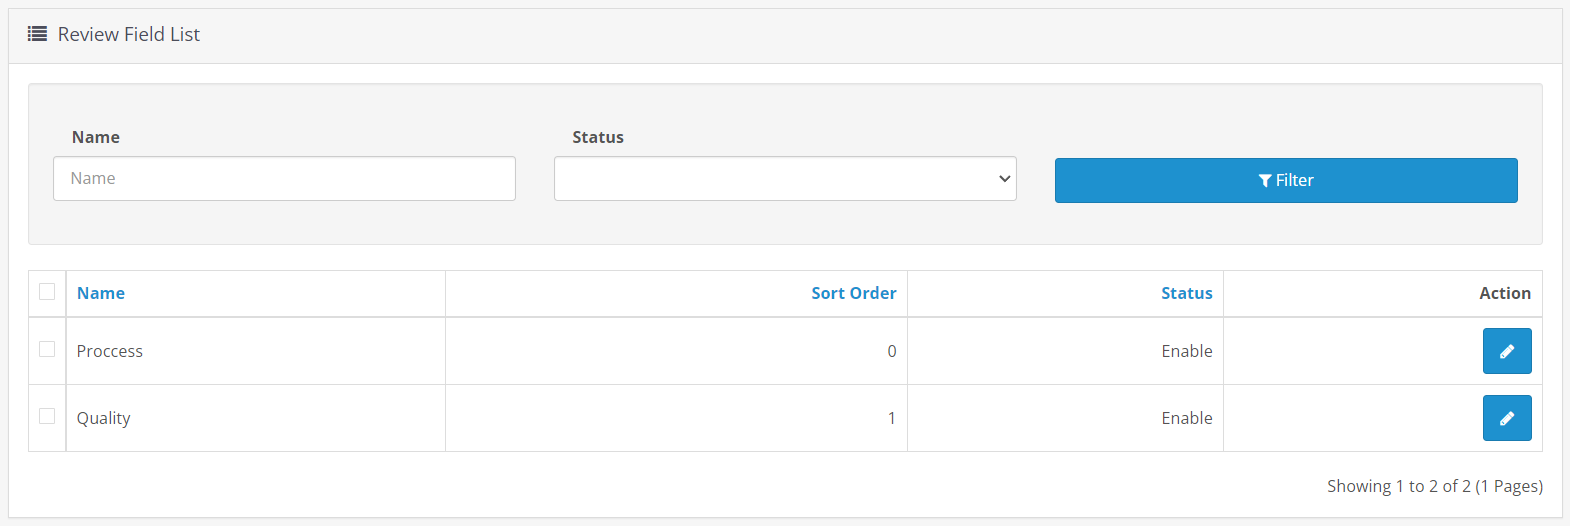
OpenCart multi vendor extension lets the admin can create additional fields for review. It will automatically come into the predefined review section. The list of previously created review files will be shown here.
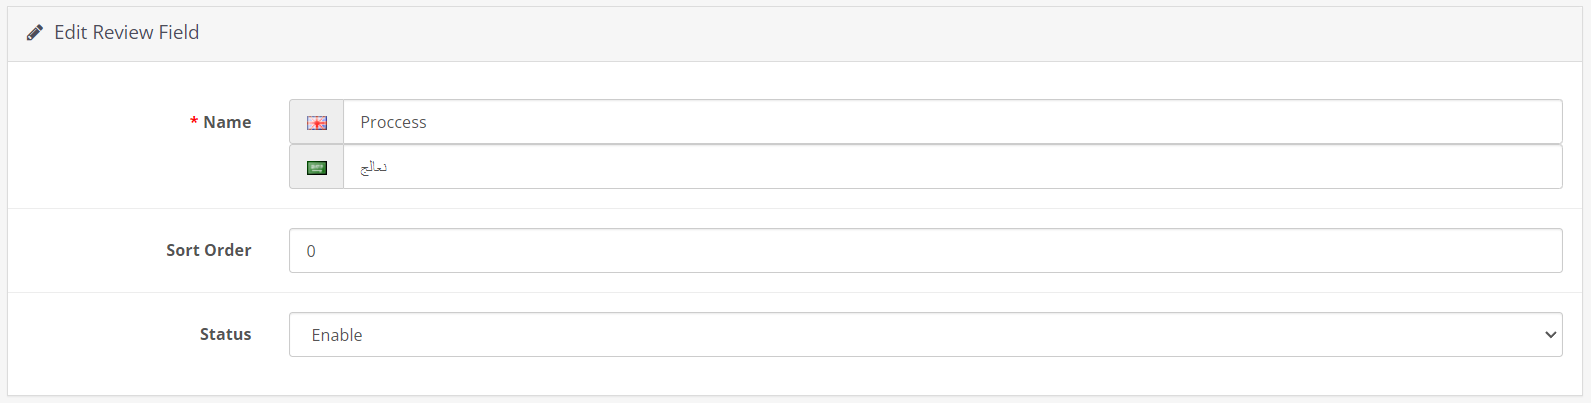
Create as many fields as needed to make the review more informative for all the vendor’s order processing and the customer will write the feedback in those fields.
Email Template Setting In OpenCart Multi-Seller Module
TMD OpenCart multivendor extension lets the admin write the email template for each event separately. There is a total of 12 events that send the email to the admin, vendor, and customer.
If the website is multilingual then, the email setting will make a new tab for each language having the language name and country flag on it. Admin must write the email in the same language as mentioned in the tab language name.
Here is a list of events that fire the email.
- Vendor signup
- Seller approves
- customer order product
- Enquirer mail
- Disapprove seller
- New product added by the seller
- Seller product approved
- seller customer contact email
- seller reply mail
- Admin reply mail
- New product add email to admin
Income
The income report has detail about the vendor earnings and their payout. It has a list of vendors who earned through their product sales. It is calculated according to ~commission~ setting.
This report shows the remaining payment to send to the vendor by admin and how total payment earned by the vendor along with other details. This report contains the vendor name, total amount, admin amount, shipping amount, vendor amount, paid to the vendor, remaining Amount, date added, etc.
Make Payment To Vendor
There is an option to make the remaining payment to the vendor. It is a good idea to send the remaining payment to each vendor. That’s why a payout button is given with each vendor record.
It will redirect the admin to the payout page, two options for payment are present, PayPal, and bank transfer. You can use either one to make the payment. And enter the amount to pay. By default OpenCart multi vendor module shows the remaining payment to the payment textbox and the same is used for the transaction. But it is up to the admin to how much to pay and is changeable.
Filter
There is a filter given for tracking down the income report by vendor, product name, model, price, product quantity, and status of the product.
Shipping Rates
This OpenCart multi seller extension lets the admin add the shipping rates per vendor. The shipping rates setting will automatically to that vendor store. All the created shipping rates created previously will show here.
Filter
A filter is given to get the required data for shipping rates. Admin can filter the data by vendor store name, zip code, price, country, weight from, and weight To. It gives flexibility to the admin to make create the shipping report as their needs using the filter parameters.
Save Inquiry Made Customers
When a customer makes an inquiry about the product in the vendor store. All the inquiries are tracked and can be viewed in the inquiry report. It helps website admin to check which product demand is high and what kind of information customers generally looking for.
Thus, takes necessary steps to improve the multivendor website UI/UX and talk with the seller to provide general information that users frequently seek to improve the sale process. So that future customers will find the answers before they make an inquiry. It will increase the ratio of sales for vendors too.
Admin can check the inquiry details such as customer name, type → logged In or guest, date, email id of the customer, product name, message, etc.
Filter
Admin can filter the report by name of inquiry, vendor, customer, and product.
Import Product To Seller Store
Other than vendor setting, this module comes with product import. Admin can import the product into vendor store. The imported product will automatically be assigned to the selected vendor store and will be visible according to product status.
The import and export option is available for the vendor too. OpenCart multi vendor extension lets the vendor import product directly to their website.
A sample import file is present, and the file that is going to import should follow the same structure as the sample file. Else import may not work correctly.
While importing the product there are some points that should be considered
- Vendor Name: Select the vendor store name for whom the admin is going to import the product.
- Import by: Product Id or Model. According to the vendor import file, whatever is unique or preferable should be selected.
- Language: Double check the product information is written in which language. And select that language from the language drop-down.
- Store: If your website is running multiple stores. Then It is really important to select the same store that is assigned to a vendor after the account is created.
- Custom Fields: All the custom fields will be visible and ready to select. The selected custom will match with the column name of the imported file to get the data into the correct custom field.
NOTE: It is important for the admin to take prior permission before going to import the product.
Product Export From Vendor Store In OpenCart
Along with product import, the admin gets a product export feature too. There are many options present that make the export, even more, better to download only requires data instead of a bunch of records and applying the filter.
Product export can be done in XLS. This format file is easily viewable and editable by Microsoft office, open office, WPS Office, Google Sheets, LibreOffice, etc.
- Vendor store name: whom admin wants to export the product.
- Category: Select the particular category or want to download all the category products, select all category.
- Manufacturer: Same as a category. Select the manufacturer attached to the product. Or Select all manufacturers to download all the products.
- Stores: Select the store that is attached to the vendor. Or select All stores to download product data of vendors from all the stores.
- Stock Status: There are 4 options to select products going out of stock within 2-3 days, in stock, out of stock, or pre-order. Select the one which is required.
- Status: Product status type: enable and disable. If the admin wants to download all the products with both statuses then select all statuses.
- Language: All the active language names will come in a drop-down. Product data will be exported in the selected language only. Data will be exported in only one language.
- Product Review: Exported product data must have been reviewed or not.
- Custom Extra Filed: If the website has additional custom fields for the product. Those custom fields will be list out here. Admin can select the fields that are required in the product exported file. If not required then leave them.
- Product Image: Select yes, if all the images of the product absolute path are present in the exported file.
- Quantity: Enter the number of quantities, It must be an integer number. The export module will check the number and match it with the product, and only export that product that is having same quantity. rest product will be discarded
- Product Name: If the admin wants to export the product with the name. The module uses the string match case formulae to match the product name. For example, If admin wrote the
Applethen OpenCart multivendor module will try to match all the product names starting withAppleand export them. - Model: This work same as the product name. Only those product will be exported which has the same model name entered by admin.
- Number of Products from – to range: How many products should be present in the export file. This option is good when a vendor has a thousand or more products.
- Price range: Enter the price range of the product. Price can be a float, decimal, or integer value.
If you have any kind of query or pre-sale question do not hesitate just create a ticket, and our team will reply to you back. Meanwhile, you can read another multi-vendor post on this blog.
If you want to buy the OpenCart multivendor extension from the official OpenCart website. We provide support on our official opencart website.
We also created more than 5 add-ons of multivendor websites. You can check the list of OpenCart multivendor addons. It has all the information about the addon and their feature.
You can also check our other modules and themes on our website TMD OpenCart modules. We have created more than 250 modules and 30 themes. You might find useful extensions for your website.